Low Voltage LED System Layout

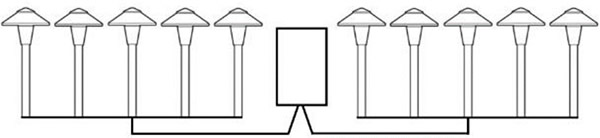
Because most LED’s can operate at a wide range of voltages with NO CHANGE in light output or lamp life, the “rules” for installing and designing a Low Voltage LED System are much more relaxed than with our halogen ancestors. The wide range of 12V LED’s that we keep in stock can operate anywhere from 9V-14V without any change in the lamp’s properties or characteristics. Therefore, we don’t have to worry about the lamps at the end of run being dimmer than the ones closest to the transformers.

Here are our easy LED installation guidelines:

  • Use a center” T” wiring method for best results, meaning splice your wire into the middle fixture first, and then “T” off to the other fixtures to the right and the left.
  • Again, because our LEDs can operate anywhere from 9V-14V you can continue to add fixtures to either side of your “T” connection if you:
    • Don’t exceed 180W on one continuous run of #12-2 gauge wire
    • Don’t fall below 9V or over 14V (although if you are using a Multi-Tap transformer, this shouldn’t be an issue)
  • For more information on Voltage Drop and working with a Multi-Tap Transformer see Installing & Working with Multi-Tap Transformers
  • Make all connections at the fixtures using silicon filled wire connectors, stripping back the insulation a minimum of 1 inch. Although a lot of manufactures supply their fixtures with plastic “quick connectors”, we recommend that you throw those away, and use silicon filled wire connectors. This will ensure that over time, dirt, bugs, and other elements, will not disturb the connection.
  • Use Kleinhuis Cord grip (water-tight) connectors on all wires exiting the transformer.
  • Record which lamps you used for each fixture, including their wattages, beam spreads and color temperatures, on a separate sheet and keep it somewhere handy for the future.
  • No matter what, never exceed 180W on one single run of 12-2 wire. That would be a lot of LED lights